Monday, February 10, 2014

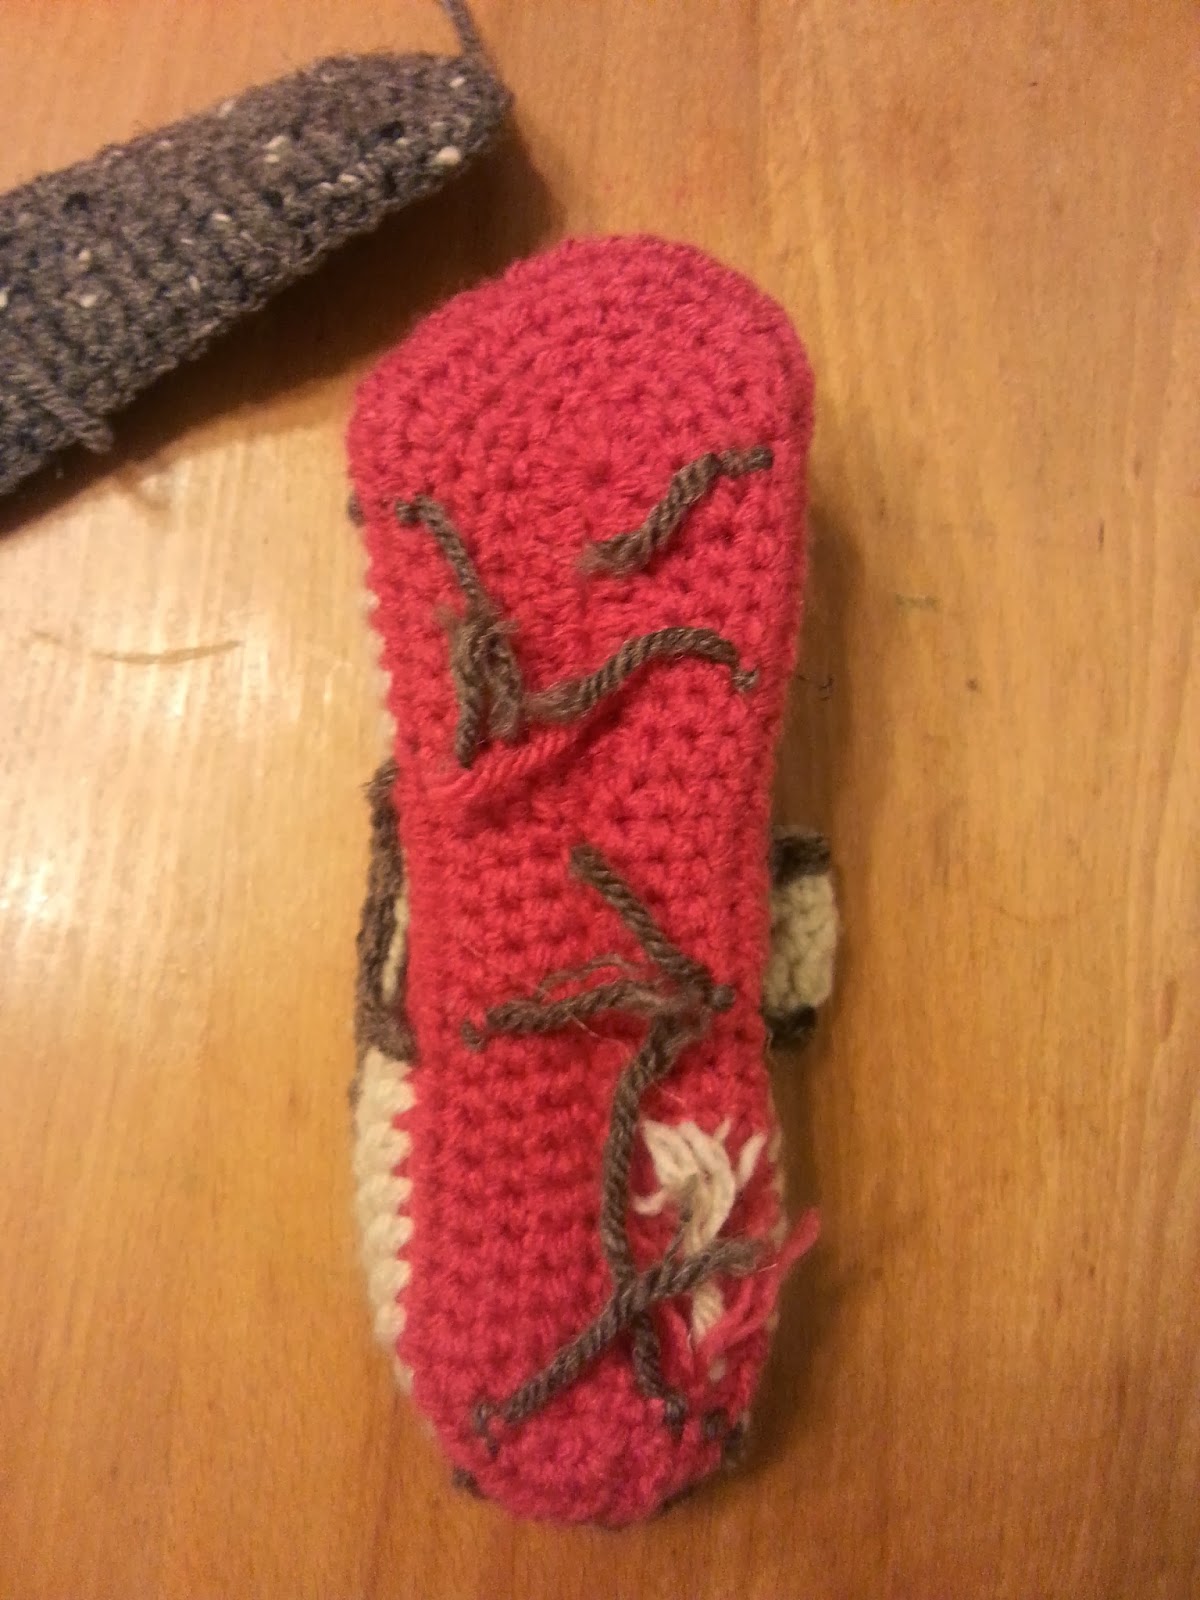
Toddler Gladiator Sandal Preview

While I was making the Two Strap Sandals, I also got the idea for this sandal in my head. I almost stopped making the first sandals because I was so excited about these.


I wanted something pretty and trendy. A few months ago I found a really cute pattern for a toddler fingerless glove that had a little flower motif on the back (if you are interested, the gloves are at crochetlatte). I really wanted to make them for C, but never did. So I thought why not make a little sandal with a fun, pretty motif on the top. I tried out a whole bunch, but decided to start with this little flower.


My husband thinks they are impractical, but really does that matter?


I'm not quite finished with the sandal because I would like to put a double sole on. I'm going to try out making it non-slip by using Plasti-dip. See here for a tutorial. You can find the colors at hardware stores like Home Depot and Lowes, but I didn't want to limit my colors that way. You can order clear online, but I just need to do it. Once I do I'll do a post on how it went.

Anyway, back to the sandal. Right now I've only made one size, hopefully I'll make another size, maybe two. I need to work on the pattern to make it clearer in some places. I love how it has come together. I think I'll try out some different motifs too. Hopefully I'll get the pattern up soon.

Read More »

Thursday, February 6, 2014

UPDATE - Toddler Double Sole Moccasin

Based on some questions I've had on the Toddler Double Sole Moccasin Pattern I added a couple more pictures to the ankle section. Hopefully that will help clarify. I also found a typo in the pattern in R11, I had too many decreased in the toe. It has been fixed.


I have been impressed with the number of people who have view the pattern. I'm glad so many people like it. I'm working on more toddler patterns for the summer.

Happy Stitches!
Read More »

Wednesday, February 5, 2014

Baskets, baskets, and more baskets

I don't know about the rest of you but my kids toys need organization, especially after Christmas. So I went looking for containers. Baskets, bins, boxes, buckets, whatever, I couldn't find anything I liked (at least that I thought was worth the money). Instead I found a pattern that I really liked and decided to make my own baskets.


The initial pattern came from Liz at Crochet in Color. It is her Chucky Crocheted Basket. I loved how sturdy it looked. I had to go out and buy the right size hook, but you can always use another hook, right? Only the medium blue variegated basket follows her pattern exactly. All of the others got modified from that.


So the medium blue green one was made from Liz's smaller pattern. I don't think the color or yarn texture (kind of fuzzy) shows off the detail of her pattern well, but it is nice and sturdy. I'm trying to remember the brand of yarn I used, but I'm at a loss. This one was easy and quick to make. I really like the way she did the seam between the bottom and the sides by stitching in the back ridge of the hdc as opposed to the actual top loops. I've used this technique in other things now that I've learned it.


The little yellow basket was actually suppose to be just a test pattern for making a oval basket. It only uses one strand of worsted weight yarn so it isn't super stiff. But it turned out to be perfect for C's crayons, because really, what three year old can keep a crayon box around for long before it gets squished and torn. It fits perfectly on her little coloring/craft table.


The biggest basket was suppose to be for me and my projects, but instead was used to hold train tracks and associated paraphernalia. Again, cardboard box and kids. The green portion is four strands of worsted weight (three different greens and cream) and the cream stripe is two strands of bulky. The reason for the stripe is because I didn't have enough of one of the greens to make the whole basket; it is 80 sts around. However, I really like the way it turned out. I think it breaks up the green nicely. I must say this was not my favorite thing to work on. Part of it was because of the four skeins of yarn I was pulling from. Another was the size. I felt like it took me forever to finish a round.


The smallest, skinny little basket hangs from the kids' easel to hold markers. The two sided easel only has a one sided tray. This one is also made of only one strand of worsted weight, mostly because it was a quick fix.


I'm sure I will be making more, but I'm basketed out for now. That green one really did me in.
Read More »

Thursday, January 30, 2014

Toddler Two Strap Sandal - Pattern

 
Last night we got another inch of snow. So why am I making sandals? I couldn't help it. I got this pattern in my head and had to get it out. I saw a baby version of this sandal somewhere, I can't remember where, but since I don't have babies I had to come up with a bigger version for my toddlers. I don't exactly like the color scheme on the bigger sandal, the pink and cream, but oh well. 


It is a fairly easy pattern to do, just a lot of pieces to it, I would say it is an advanced beginner. If you have made or looked at my toddler moccasin pattern the sole portion is the same for this shoe. Hey, if it works why change it.


Materials:
Worsted weight yarn, two or three colors
Hook G – 4.00mm
two buttons
needle and small amount of thread to sew buttons

Abbreviations:
ch – chain
st – stitch
sl st – slip stitch
sk – skip
sc – single crochet
hdc – half double crochet
dc – double crochet
sc2tog – single crochet two stitches together
sc3tog – single crochet three stitches together
dc2tog – double crochet two stitches together
RS – right side
WS – wrong side

Notes:
This pattern is written for two sizes. First size measures about 6 ¼ inches or a toddler size 9/10, the larger size measures about 7 inches or a toddler size 11/12. The larger size is designated in () in the sole and strap.

Sole
Make 2 for bottom sole and 2 for top sole, four total
Note: it is best to make the soles from the same brand of yarn so they match in size

Ch 19 (23)
R1: 2 sc in 2nd ch from hook, sc 10 (12), hdc, dc 5 (7), 7 dc in last ch, working opposite side of ch, dc 5 (7), hdc, sc 10 (12), 2 sc in last ch, sl st to first sc – 43 (51) sts
R2: ch 1, sc, 2 sc, sc 15 (19), *hdc, 2 hdc* repeat x 4, hdc, sc 15 (19), 2 sc, sc, sl st to first sc – 49 (57) sts
R3: ch 1, 2 sc, sc, 2 sc, sc 17 (21), *hdc, 2 hdc* repeat x 2, 2 hdc, *2 hdc, hdc* repeat x 2, sc 17 (21), 2 sc, sc, 2 sc, sl st to first sc – 58 (66) sts
R4: ch 2, hdc, 2 hdc, hdc 21 (25), *hdc, 2 hdc* repeat x 3, *2 hdc, hdc* repeat x 3, hdc 21 (25), 2 hdc, hdc, sl st to first hdc, fasten off – 66 (74) sts

Body
Size 9/10
with RS of top sole facing up, sl st to 2nd st from seam
R5 – ch 3 (counts as first dc), dc 9, ch 6, sk 6, dc 6, ch 10, sk 18, dc 6, ch 6, sk 6, dc 10, ch 4, sk 4, sl st to 3rd ch of ch 3
R6 – ch 1, sc in same st, sc 20, sc2tog, hdc 8 (across toe ch), sc2tog, sc 25, sl st to first sc
R7 – ch 1, sc in same st, sc 19, sc2tog, hdc 8, sc2tog, sc 20, dc2tog x 2, sl st to first sc
R8 – ch 1, sc in same st, sc 18, sc3tog, hdc 6, sc3tog, sc 19, hdc 2, sl st to first sc, fasten off

Size 11/12
with RS of top sole facing up, sl st to 3rd st from seam
R5 – ch 3 (counts of first dc), dc 9, ch 7, sk 7, dc 8, ch 10, sk 18, dc 8, ch 7, sk 7, dc 10, ch 6, sk 6, sl st to 3rd ch of ch 3
R6 – ch 1, sc in same st, sc 23, sc2tog, hdc 8, sc2tog, sc 30, sl st to first sc
R7 – ch 1, sc in same st, sc 22, sc2tog, hdc 8, sc2tog, sc 23, hdc, dc2tog x 2, hdc, sl st to first sc
R8 – ch 1, sc in same st, sc 21, sc3tog, hdc 6, sc3tog, sc 23, hdc 2, sc, sl st to first sc, fasten off

Strap
For left shoe, join in 11th st from seam, for right shoe, join in 33rd (39th) st from seam
Ch 16
R1 – in 3rd ch from hook hdc, hdc 13, sl st in shoe in st next to join, sl st in next st, turn
R2 – sk sl sts, hdc in first hdc, hdc 10, ch 2, sk 2, hdc, turn
Note: for smaller button hole – ch 1, sk 1, hdc 2, turn
R3 – ch 2, hdc 14, sl st in next st on shoe, fasten off

Edging
Using color of choice, sl st around all openings (toe, side vents, and heel), as well as the top of body and strap.

Attaching the bottom sole
Pull all yarn ends through the bottom of the top sole.

Place the WS of the bottom sole against the wrong side of the top sole, tucking all loose ends between them.
Line the soles up and, using the same color as the bottom sole, sl st the soles together, sl st between the hdc posts, with the stitch against the bottom sole. 

The sl st between the post as opposed to the top of the stitch will give a better edge to the sandal

Finishing
Sew on button and enjoy.


If you have any questions or find any mistakes let me know. This pattern is for personal use only, if you want to sell a finished product please credit me for the design. Thanks and happy stitches!


Read More »

Friday, January 24, 2014

Little Einstein dolls - Annie and Leo

My children love Little Einsteins. It makes for a very musical household since they sing the tunes and play pretend instruments (or not pretend in some cases). So I went looking this Christmas for Little Einstein toys. Toy figures, dolls, anything, but no. Nothing. Nada. Well, that's not quite true. I did find some toys for sale on ebay. $100. Are you kidding?!

So I thought, I can make dolls. Simply crochet up a doll and put the right clothes on. Okay, not exactly simple. I'm not a fast crocheter at all. Seriously, super slow. So I only got one done in time for Christmas. I made up Annie first for my daughter.


I am not completely pleased with how it turned out, especially the head, but my kids loved it. Lucky for me they are nearly as critical. After a number of fights, I knew I needed to make another one. So I went with Leo.


I wrote down a quick pattern while I was making Annie, so it was a little easier to make Leo. I still don't like the size of the head. For those of you who have seen the Little Einsteins, their heads are pretty big. But I decided just to stick with how I did Annie's so it would be the same. (I might have a slight case of OCD.) I do like how his glasses turned out. So now we have brother and sister.


I do plan on making June and Quincy, but I am done with amigurumi for awhile. C would like me to make Rocket too, but I don't know if I'm that talented. Or maybe it's more of I don't want to put forth that much effort. When I get the other two made I'll put them up. I will have to get to them soon. It will bother me if I don't have all of them (that OCD again).


Happy stitches!
Read More »

Thursday, January 23, 2014

Newborn Mary Janes - Pattern

After making the little loafers, I wanted to make a girl version. There are a lot of little Mary Janes out there. This pattern is really quick (seven rounds) and the post stitch added just enough detail to pretty it up. It is pretty much the same as the Newborn Loafer but the post stitches are continued up one more round and of course the little strap over the top. I think they are super cute and if you add the ribbon or contrasting yarn color around the bottom it adds even more detail.


Materials:
worsted weight yarn
Hook G – 4.00 mm
Yarn needle
1/4 inch ribbon, if desired

Abbreviations:
ch – chain
st(s) - stitch(es)
sk - skip
sc – single crochet
hcd – half double crochet
sl st – slip stitch
BLO – back loop only
fpdc – front post double crochet
sc2tog – single crochet two together
dc2tog – double crochet two together
dc3tog – double crochet three together

Note:
Shoes measure about 3 1/2 inches

ch 13
R1 - in 2nd ch from hook 2 sc, sc 8, hdc 2, 7 hdc in last ch, working opposite side of chain, hdc 2, sc 8, 2 sc, sl st to first sc (31 sts)
R2 - ch 1, sc, 2 sc, sc 8, hdc 2, 2 hdc x 3, hdc, 2 hdc x 3, hdc 2, sc 8, 2 sc, sc, sl st to first sc (39 sts)
R3 - ch 1, in BLO hdc around, sl st to first hdc (39 sts)
R4 - ch 2, *fpdc, hdc* x 19, fpdc around last st, sl st to first st (39 sts)
R5 - ch 2, *fpdc, hdc* x 7, dc2tog x 2, dc, dc3tog, dc, dc2tog x2, *hdc, fpdc* x 6, sl st to first st (33 sts)
R6 - ch 1, sc, sctog, sc 9, sc2tog, dc2tog, dc3tog, dc2tog, sc2tog, sc 7, sc2tog, sc, sl st to first sc (25 sts)
R7 - sl st 9 loosely, ch 5, sk 7, sl st 8 loosely, fasten off. 


If you want to add the ribbon weave it through the first round of fpdc. The ribbon I used was a little too wide so it folded. It was 3/8 inches, so I would go with a 1/4 inch ribbon. You can also use yarn, but the ribbon is a little dressier.


If you have any questions or find any mistakes let me know. This pattern is for personal use only, if you want to sell a finished product please credit me for the design. Thanks and happy stitches!
Read More »

Wednesday, January 22, 2014

Newborn Loafers - Pattern

I made a version of this little guy one night when I was trying to snaz up a little bootie I like to make. I was making a boot for another new mom when I thought let's try something a little different. I added the front post stitches at the bottom to add a little texture but before I got to the top of the boot I decided it looked like a little clog. I jokingly told my husband that I should put a little buckle on and make it a loafer, but he suggested a tassel. So I started again with my own design and came out with this. This is an incredibly fast shoe to make with only seven rounds. I have made a girl version Mary Jane as well that I will get up soon.


Materials:
worsted weight yard (Vanna's Choice shown here, but not sure of exact color)
Hook G – 4.00 mm
Yarn needle

Abbreviations:
ch – chain
st(s) - stitch(es)
sc – single crochet
hcd – half double crochet
sl st – slip stitch
BLO – back loop only
fpdc – front post double crochet
sc2tog – single crochet two together
dc2tog – double crochet two together
dc3tog – double crochet three together

Note:
Shoes measure about 3 1/2 inches

ch 13
R1 – in 2nd ch from hook 2 sc, sc 8, hdc 2, 7 hdc in last ch, working opposite side of chain, hdc 2, sc 8, 2 sc, sl st to first sc (31 sts)
R2 – ch 1, sc, 2 sc, sc 8, hdc 2, 2 hdc x 3, hdc, 2 hdc x 3, hdc 2, sc 8, 2 sc, sc, sl st to first sc (39 sts)
R3 – ch 1, in BLO hdc around, sl st to first hdc (39 sts)
R4 – ch 2, *fpdc, hdc* x 19, fpdc around last st, sl st to first st (39 sts)
R5 – ch 1, sc 14, sc2tog, dc2tog, dc, dc3tog, dc, dc2tog, sc2tog, sc 12, sl st to first sc (33 sts)
R6 – ch 1, sc, sc2tog, sc 9, sc2tog, dc2tog, dc3tog, dc2tog, sc2tog, sc 7, sc2tog, sc, sl st to first sc (25 sts)
R7 – ch 1, sc 9, sc2tog, dc, dc3tog, dc, sc2tog, sc 7, sl st to first sc, fasten off (21 sts)

Tassels:
Make 2
Wrap yarn around three fingers three times.
Cut yarn loops open on the same side as end pieces.


To help keep pieces together insert a hook at other end.
Using a small piece of yarn, tie together pieces near top loop and wrap around three or four times tightly.


Using yarn needle, thread the end of yarn through the middle of the wrapped area to secure.


Cut another small piece of yarn, thread through top loop, and tie to shoe at the dc3tog of last round.

Trim ends to slightly above toe of shoe.


If you have any questions or find any mistakes let me know. This pattern is for personal use only, if you want to sell a finished product please credit me for the design. Thanks and happy stitches!


Read More »

Printfriendly