Showing posts with label amigurumi. Show all posts

Sunday, October 19, 2014

Amigurumi Person - Pattern

In the past few months I have made a number of dolls for my kids or other family members. I've been tweaking the pattern each time, but I think I've come up with a good pattern for a person now. I'm writing the pattern without any color changes for clothes, though I will make a note in the row where clothes might be started if desired.


Materials
Worsted weight yarn
Hook F (3.75mm)
stitch marker
Embroidery thread for face features (if desired)
Safety eyes (if desired)

Abbreviations
ch - chain
st(s) - stitches
sl st - slip stitch
sc  - single crochet
hdc - half double crochet
dc - double crochet
sc2tog - single crochet 2 together
dc2tog - double crochet 2 together
dc3tog - double crochet 3 together
BLO - back loop only

Note: work done in joined rounds until head, then change to continuous rounds
Legs (make 2)
ch 11
R1 - in 2nd ch from hook 2sc, sc 5, hdc 3, 5hdc in last ch, working opposite side of ch hdc 3, sc 5, 2sc, sl st in first sc (25 sts)
R2 - ch 1, 2sc x 2, sc 8, 2hdc x 2, hdc, 2hdc x 2, sc 8, 2sc x 2, sl st to first sc (33 sts)
R3 - ch 1, sc around in BLO, sl st to first sc (33 sts)
R4 - ch 1, sc around, sl st to first sc (33 sts)
R5 - ch 1, sc 12, sc2tog, dc2tog, dc3tog, dc2tog, sc2tog, sc 10, sl st to first sc (27 sts) end ballet shoes here
R6 - ch 1, sc 11, sc2tog, dc3tog, sc2tog, sc 9, sl st to first sc (23 sts)
R7 - ch1, sc 10, dc2tog, dc, dc2tog, sc 8, sl st to first sc (21 sts)
R8 - ch 1, sc 9, sc2tog, sc, sc2tog, sc 7, sl st to first sc (19 sts)  end shoes here
Stuff foot
R9-10 - ch 1, sc around, sl st to first sc (19 sts)
R11 - ch 1, sc 10, sc2tog, sc 7, sl st to first sc (18 sts) end boots here
R12-26 - ch 1, sc around, sl st to first sc (18 sts)
Add stuffing to leg
R27 - ch 1, 2sc, sc 8, 2sc, sc 8, sl st to first sc (20 sts)
R28-35 - ch 1, sc around, sl st to first sc (20 sts)
Fasten off, stuff almost to top of leg


Body
place legs together, find where the legs touch in the middle, this is where you will connect the legs together


R1 - sl st  4 middle sts of each leg together, continuing only on left leg, sc in next st, sc 15 around leg, continue to first open st on right leg, sc 16, sl st to first sc (32 sts)


R2-9 - ch 1, sc around, sl st to first sc (32 sts) end pants here
Stuff rest of each leg and some of body
R10 - ch 1, sc 8, 2sc, sc 15, 2sc, sc 7, sl st to first sc (34 sts)
R11-26 - ch 1, sc around, sl st to first sc (34 sts)
R27 - ch 1, sc 11, sc2tog, sc 15, sc2tog, sc 4, sl st to first sc (32 sts)
Remember to add your safety eyes if you are using them!
R28 - ch 1, sc 8, sc2tog, sc 3, sc2tog, sc 9, sc2tog, sc 3, sc2tog, sc, sl st to first sc (28 sts)
R29 - ch 1, sc 8, sc2tog, sc, sc2tog, sc 9, sc2tog, sc, sc2tog, sc, sl st to first sc (24 sts)
R30 - ch 1, sc 7, sc2tog, sc, sc2tog, sc 7, sc2tog, sc, sc2tog, sl st to first sc (20 sts)
R31 - ch 1, sc 8, sc2tog, sc 8, sc2tog, sl st to first sc (18 sts) end shirt here
Stuff rest of body
DO NOT FASTEN OFF

Head (continue from body, start continuous rounds, placing stitch marker at the beginning stitch of each round)
R1 - ch 1, *sc, sc2tog* x 6 (12 sts)
R2 - *sc, 2sc* x 6 (18 sts)
R3 - *sc 2, 2sc* x 6 (24 sts)
R4 - *sc 3, 2sc* x 6 (30 sts)
R5 - *sc 4, 2sc* x 6 (36 sts)
R6 - *sc 5, 2sc* x 6 (42 sts)
R7 - *sc 6, 2sc* x 6 (48 sts)
Stuff neck tightly
R8-15 - sc around (48 sts)
R16 - *sc 6, sc2tog* x 6 (42 sts)
R17 - *sc 5, sc2tog* x 6 (36 sts)
R18 - *sc 4, sc2tog* x 6 (30 sts)
R19 - *sc 3, sc2tog* x 6 (24 sts)
R20 - *sc 2, sc2tog* x 6 (18 sts)
Stuff rest of head
R21 - *sc, sc2tog* x 6 (12 sts)
R22 - sc2tog x 6 (6 sts)
Fasten off


Arms (done in joined rounds) (make 2)
ch 3
R1 - in 2nd ch from hook 2sc, 4sc in next (last) ch, working on opposite side of ch, 2sc, sl st to first sc (8 sts)
R2 - ch 1, sc, 2sc x 2, sc 2, 2sc x 2, sc, sl st to first sc (12 sts)
R3 - ch 1, sc, 2sc, *sc 2, 2sc* x 3, sc, sl st to first sc (16 sts)
R4-8 - ch 1, sc around, sl st to first sc (16 sts)  Hands end here
R9 - ch 1, sc2tog, sc 6, sc2tog, sc 6, sl st to first sc (14 sts)
Stuff hands
R10-27 - ch 1, sc around, sl st to first sc (14 sts)
Stuff rest of arm
R28-30 - sl st 4, sc, hdc 7, sc, sl st
                Note: make sure to keep the sl sts loose so you can easily work into them
Fasten off, leaving long tail to sew to body.


Sew arms on around R29 and R30 of body.


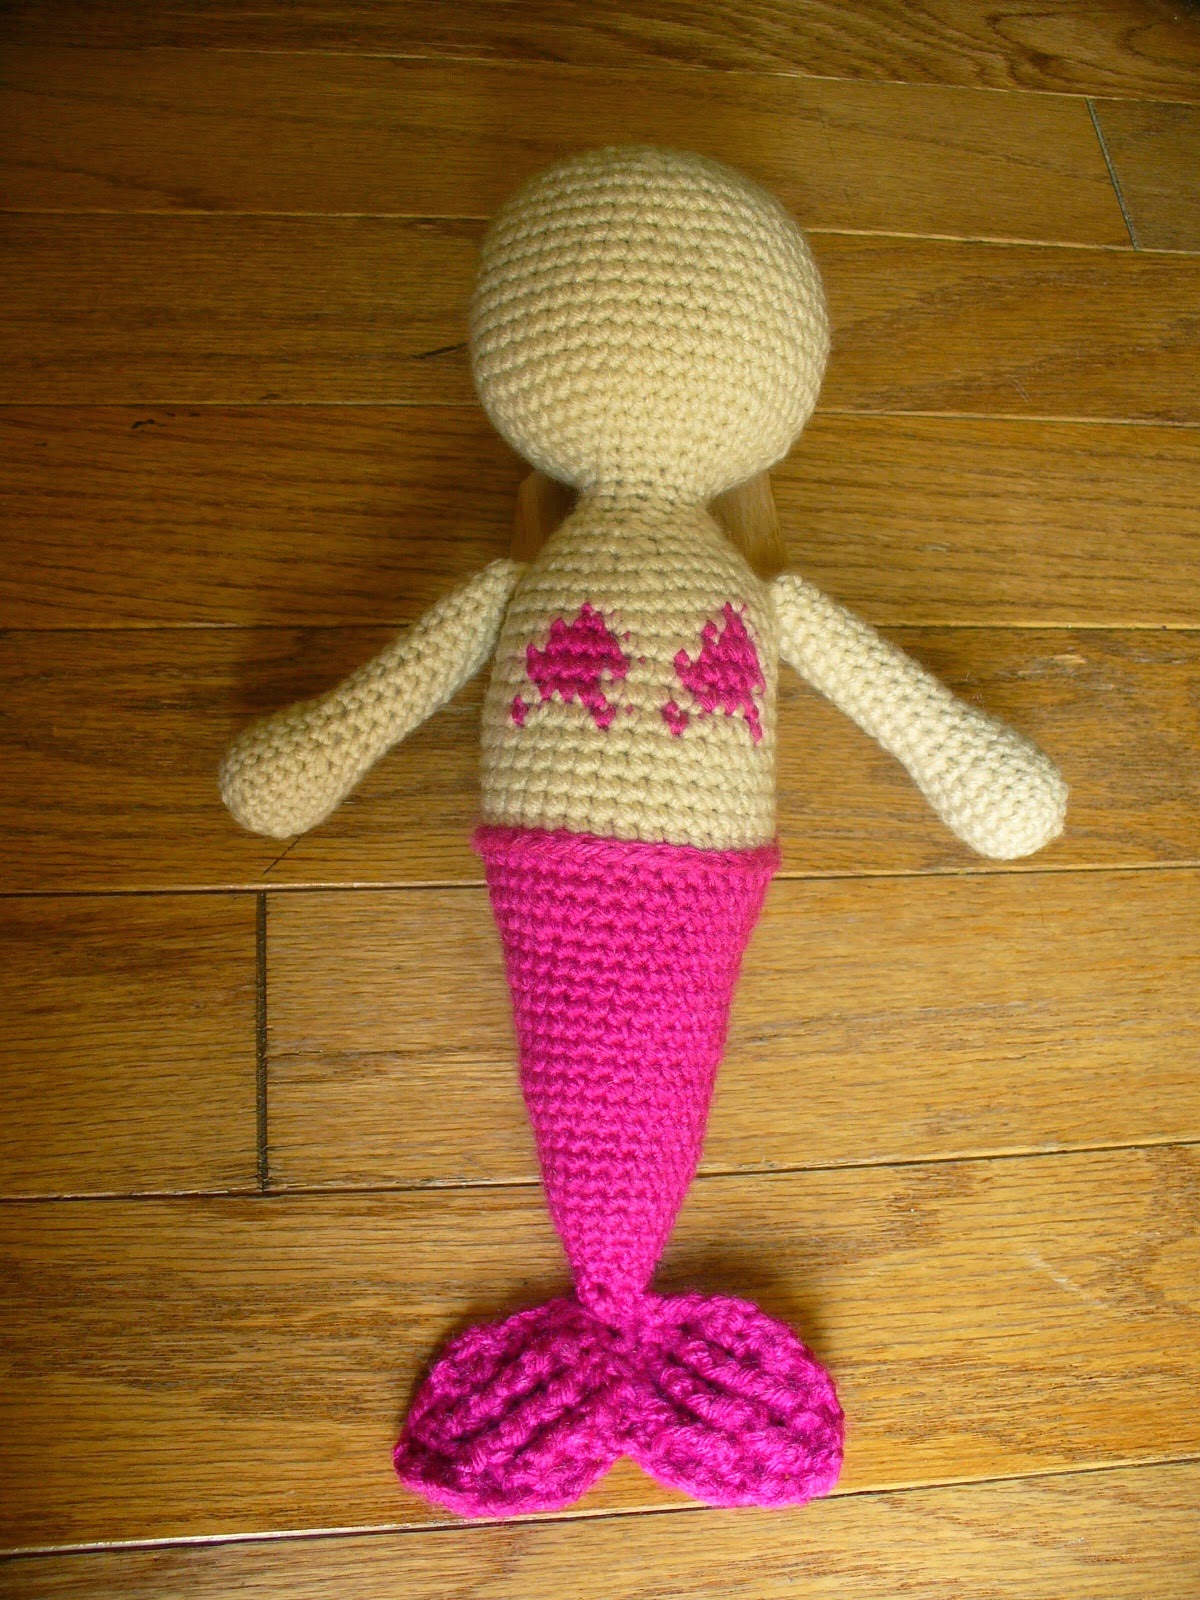
This is the basic body for a amigurumi person. You can add hair and facial features many ways. I have found good hair tutorials here at EssHaych and here at K and J Dolls, or use your favorite way.

I hope you have fun making this with your own colors and embellishments. This is the ballerina I made for my niece.


This pattern is for personal use only. If you would like to sell a finished product, please credit me for the design. Happy Stitches!

Read More »

Thursday, October 2, 2014

Little Witch - Pattern

I meant to get this little gal up yesterday for the first day of October, but I was having a lazy day and didn't feel like typing.
Anyway, Happy October! Are you getting ready for Halloween yet? Well if you are here is a little cheery witch to help you along. She is the same size as my Little Scarecrow and made pretty much the same way. I've added a few accessories with her for a little more fun.


Materials
Worsted weight yarn, multiple colors
Hook G (4.00 mm)
Stitch marker
Stuffing
Yarn needle
Embroidery thread for embellishments

Abbreviations
ch - chain
sl st - slip stitch
sc  - single crochet
hdc - half double crochet
sc2tog - single crochet two together
BLO - back loop only
FLO - front loop only

Note: Worked in continuous rounds, place stitch marker in the first stitch of round, moving it up each round to mark the beginning of the round.

Body and Head
with purple or black, ch 2
R1 - 6sc in first ch (6 sts)
R2 - 2sc in each sc (12 sts)
R3 - *sc, 2sc* x 6 (18 sts)
R4 - *sc 2, 2sc* x 6 (24 sts)
R5 - *sc 3, 2sc* x 6 (30 sts)
R6 - *sc 4, 2sc* x 6 (36 sts)
R7 - in BLO sc around (36 sts)
R8-9 - sc around (36 sts)
R10 - *sc 7, sc2tog* x 4 (32 sts)
R11 - sc around (32 sts)
R12 - *sc 6, sc2tog* x 4 (28 sts)
R13 - sc around (28 sts)
R14 - *sc 5, sc2tog* x 4 (24 sts)
R15 - sc around (24 sts)
R16 - *sc 4, sc2tog* x 4 (20 sts)
R17 - sc around (20 sts)
R18 - *sc 3, sc2tog* x 4 (16 sts)
R19 - sc around (16 sts)
Stuff the body
R20 - *sc 2, sc2tog* x 4 (12 sts)
R21 - sc around (12 sts)
R22 - change to flesh color, *sc, 2sc* x 6 (18 sts)
R23 - *sc 2, 2sc* x 6 (24 sts)
R24-27 - sc around (24 sts)
R28 - *sc 2, sc2tog* x 6 (18 sts)
R29 - *sc, sc2tog* x 6 (12 sts)
Stuff the rest of the body and head
R30 - sc2tog x 6 (6 sts)
Fasten off


Arms

with flesh color, ch 2
R1 - 4sc in first ch (4 sts)
R2 - 2sc in each sc (8 sts)
R3 - sc around (8 sts)
R4-9 - change to dress color, sc around (8 sts)
Fasten off, leaving long tail for sewing
Stuff lightly and sew to body, I attached them around R19.


Hat

with same color as dress, ch 2
R1 - 6sc in first ch (6 sts)
R2 - sc around (6 sts)
R3 - *sc, 2sc* x 3 (9 sts)
R4 - sc around (9 sts)
R5 - *sc 2, 2sc* x 3 (12 sts)
R6 - sc around (12 sts)
R7 - *sc 3, 2sc* x 3 (15 sts)
R8 - sc around (15 sts)
R9 - *sc 4, 2sc* x 3 (18 sts)
R10 - sc around (18 sts)
R11 - in FLO sc around (18 sts)
R12 - *hdc 2, 2hdc* x 6 (24 sts)
R13 - *hdc 3, 2hdc* x 6 (30 sts)
Fasten off, leaving long tail for sewing

Before sewing the hat on the head I added a little bit of hair. I used a hair tutorial from EssHaych. It is the same method I used for the adding the hay around the Little Scarecrow. I left the top round bare since the hat will cover that part of the head.


 Once you have the hair on, sew the hat to the head. I lightly stuffed it to give it some stiffness.


 Add a face and there you go, a little witch to help celebrate the holiday season.


This pattern is for personal use only. If you would like to sell a finished product, please credit me for the design. Happy Stitches!
Read More »

Monday, September 1, 2014

Little Scarecrow - Pattern

My favorite season is autumn. I love the cooler weather. I love the colors. And I love the decorations. I'm celebrating the first day of September (even though it is in no way cool here) by sharing my new favorite crochet project. Here is a cute little scarecrow to decorate your table or shelf.


Materials
Worsted weight yarn, multiple colors
Hook G (4.00 mm)
Stitch marker
Stuffing
Yarn needle
Embroidery thread for embellishments

Abbreviations
ch - chain
sl st - slip stitch
sc  - single crochet
hdc - half double crochet
sc2tog - single crochet two together
BLO - back loop only
FLO - front loop only

Note: Worked in continuous rounds, place stitch marker in the first stitch of round, moving it up each round to mark the beginning of the round.

Body and Head
with blue, ch 2
R1 - 6 sc in first ch (6 sts)
R2 - 2sc in each sc (12 sts)
R3 - *sc, 2sc* x 6 (18 sts)
R4 - in BLO sc around (18 sts)
R5 - *sc 2, 2sc* x 6 (24 sts)
R6 - *sc 3, 2sc* x 6 (30 sts)
R7-11 - sc around (30 sts)
R12-14 - change to shirt color, sc around (30 sts)
R15 - *sc2tog, sc 3* x 6 (24 sts)
R16 - *sc2tog, sc 2* x 6 (18 sts)
Stuff the body
R17 - *sc2tog, sc* x 6 (12 sts)
R18 - change to yellow, sc around (12 sts)
R19 - change to cream, *sc, 2sc* x 6 (18 sts)
R20 - *sc 2, 2sc* x 6 (24 sts)
R21-24 - sc around (24 sts)
R25 - *sc2tog, sc 2* x 6 (18 sts)
R26 - *sc2tog, sc* x 6 (12 sts)
Stuff the rest of the body and head
R27 - sc2tog x 6 (6 sts)
Fasten off


Arms (make 2)

with yellow, ch 2
R1 - 4 sc in first ch (4 sts)
R2 - 2sc in each sc (8 sts)
R3 - sc around (8 sts)
R4-9 - change to shirt color, sc around (8 sts)
Fasten off, leaving long tail to sew to body
Stuff the arms lightly and sew to body. I attached them around R16.


Overall Bib (make 2)

with blue, begin with long tail for sewing later, ch 7
R1 - sc in 2nd ch from hook, sc 5, turn (6 sts)
R2 - ch 1, sc 6, turn (6 sts)
R3 - ch 1, sc 6, ch 9, do not fasten off but leave long tail for one more st and sewing in


  • sew bottom edge of bib to body at color change between pants and shirt, making sure ch 9 straps are on opposite sides
  • bring strap over shoulder and sl st to corner sc of R3 of other bib, weave in end
  • repeat with second strap

Hat

with brown, ch 2
R1 - 6 sc in first st (6 sts)
R2 - *sc, 2sc* x 3 (9 sts)
R3 - *sc 2, 2sc* x 3 (12 sts)
R4-5 - sc around (12 sts)
R6 - *sc, 2sc* x 6 (18 sts)
R7-8 - sc around (18 sts)
R9 - in FLO sc around (18 sts)
R10 - *hdc, 2hdc* x 9 (27 sts)
R11 - *hdc 2, 2hdc* x 9 (36 sts)
Fasten off, leaving long tail and sew to head. I didn't put any stuffing in the hat, but you can if you want it a little stiffer.


Now to add the hay around the neck and arms. If this is going to be a toy for a younger child, you might want to skip this step as it can be pulled loose easily.
  • cut about 35 piece of yellow yarn about 3.5 inches long
  • using a smaller hook (I used a size E 3.5mm hook), slip the hook in the bottom hole and out  top hole of the yellow row.
  • fold a piece of yarn in half and pull the loop through with your hook.
  • grab the ends with your hook and pull them through the loop. 
  • pull tight
  • continue around the yellow row, in each sc. I added a extra piece in the front couple sc and also in the back at the color change to help hide the change.
 

Do the same steps around the hands at the last row of yellow. For this I just did one piece in each sc.


Now trim the yarn down to the length you want and fluff it a little.


Add eyes and a mouth, maybe a patch on the pants or hat and you have a little scarecrow.


I made another one using two strands of yarn for the shirt for a plaid look. I used a sport weight and a fingering weight together.


Too cute.


This pattern is for personal use only. If you would like to sell a finished product, please credit me for the design. Happy Stitches!
Read More »

Thursday, June 12, 2014

Lovely Mermaid - Pattern

Another mythical creature for you. It's a lovely little mermaid. Did anyone else pretend to be a mermaid whenever you went swimming? I did. I loved the idea of my hair flowing through the water. I don't know that it really did, but I pretended so.


Materials:
Worsted Weight yarn, three colors
Crochet thread or embroidery floss for details
Hook G (4.00 mm)
stitch marker
yarn needle
stuffing

Abbreviations:
ch - chain
st(s) - stitch(es)
sl st - slip stitch
sc - single crochet
hdc - half double crochet
dc - double crochet
sc2tog - single crochet two together
fpdc - front post double crochet
bpdc - back post double crochet

Note:
Done in continuous rounds, place stitch marker in the first stitch of round, moving it up each round to mark the beginning of the round.

Fin
ch 4, sl st to first ch to form ring
R1 - sc 5 into center of ring, turn
R2 - ch 1, 2sc in each sc, turn (10 sts)
R3 - ch 3 (counts as dc), dc in first sc, dc, *2dc, dc* x 4, turn (15 sts)
Starting first fin point
R4 - ch 1, 2hdc, *fpdc, bpdc* x 3, hdc, turn (9 sts, 7 sts left unstitched)
R5 - ch 1, 2hdc, *fpdc, bpdc* x 3, hdc 2, turn (10 sts)
R6 - ch 1, sc2tog, *fpdc, bpdc* x 3, sc2tog, turn (8 sts)
R7 - ch 1, sc2tog, *bpdc, fpdc* x 2, sc2tog, turn (6 sts)
R8 - ch 1, sc2tog, fpdc, bpdc, sc2tog, turn (4 sts)
R9 - ch 1, sc2tog x 2 (2 sts)
R10 - ch 1, sc2tog
Fasten off


Go back to unstitched sts of R4 for second fin point
R4 - join at same st as last st of row, hdc in same st as join, *bpdc, fpdc* x 3, 2hdc, turn (9 sts)
R5 - ch 1, hdc 2, *bpdc, fpdc* x 3, 2hdc, turn (10 sts)
R6 - ch 1, sc2tog, *bpdc, fpdc* x 3, sc2tog, turn (8 sts)
R7 - ch 1, sc2tog, *fpdc, bpdc* x 2, sc2tog, turn (6 sts)
R8 - ch 1, sc2tog, bpdc, fpdc, sc2tog, turn, (4 sts)
R9 - ch 1, sc2tog x 2 (2 sts)
R10 - ch 1, sc2tog
Fasten off


Tail (continuous rounds)
ch 2
R1 - in 2nd ch from hook sc 4
R2 - 2sc in each st (8 sts)
R3 - sc around (8 sts)
R4 - *2sc, sc* x 4 (12 sts)
R5 - sc around (12 sts)
R6 - *2sc, sc 2* x 4 (16 sts)
R7 - sc around (16 sts)
R8 - *2sc, sc 3* x 4 (20 sts)
R9-11 - sc around (20 sts)
R12 - 2sc, sc 4* x 4 (24 sts)
R13-15 - sc around (24 sts)
R16 - *2sc, sc 5* x 4 (28 sts)
R17-18 - sc around (28 sts)
R19 - *2sc, sc 6* x 4 (32 sts)
R20-21 - sc around (32 sts)
R22 - *2sc, sc 7* x 4 (36 sts)
R23-24 - sc around (36 sts)
R25 - hdc around, sl st in first st to close
Fasten off and add stuffing

Sew on fin to bottom on tail


Body
For the first row of the body, you will be working into the back ridge of the hdc. This is not the back loop of the stitch but ridge behind the top stitches. This pushes the top loops out to form almost a seam look. It adds a little extra definition between the tail and body.

Change to flesh color, join in back ridge of hdc

R1 - sc around in the back ridge of hdc (36 sts)

  
R2-5 - sc around (36 sts)

To make the stars, you will need to change color back to tail color [TC] for a few stitches in the round as well as using the flesh color [FC]. I carried the color not in use behind the stitches. I did break off the TC each round.

R6 - [FC] sc 3, [TC] sc, [FC] sc 3, [TC] sc, [FC] sc 2, [TC] sc, [FC] sc 3, [TC] sc, [FC] 21 (36 sts)
R7 - [FC] sc 4, [TC] sc 3, [FC] sc 4, [TC] sc 3, [FC] sc 22 (36 sts)
R8 - [FC] sc 3, [TC] sc 5, [FC] sc 2, [TC] sc 5, [FC] sc 21 (36 sts)
R9 - Repeat R7
R10 - [FC] sc 5, [TC] sc, [FC] sc 6, [TC] sc, [FC] sc 23 (36 sts)
R11 - sc around (36 sts)
R12 - *sc2tog, sc 7* x 4 (32 sts)
R13 - *sc2tog, sc 6* x 4 (28 sts)
R14 - *sc2tog, sc 5* x 4 (24 sts)
Add stuffing
R15 - *sc2tog, sc 2* x 6 (18 sts)
R16 - *sc2tog, sc* x 6 (12 sts)
R17-18 - sc around (12 sts)
DO NOT FASTEN OFF


Head
continuing from body
R19 - *2sc, sc* x 6 (18 sts)
R20 - *2sc, sc 2* x 6 (24 sts)
R21 - *2sc, sc 3* x 6 (30 sts)
Stuff the rest of the body and neck making sure to tightly stuff the neck so the head doesn't flop
R22 - *2sc, sc 4* x 6 (36 sts) 
R23 - *2sc, sc 5* x 6 (42 sts)
R24 - *2sc, sc 6* x 6 (48 sts) 
R25-34 - sc around (48 sts)
R35 - *sc2tog, sc 6* x 6 (42 sts)
R36 - *sc2tog, sc 5* x 6 (36 sts)
R37 - *sc2tog, sc 4* x 6 (30 sts)
R38 - *sc2tog, sc 3* x 6 (24 sts)
R39 - *sc2tog, sc 2* x 6 (18 sts)
Add stuffing
R40 - *sc2tog, sc* x 6 (12 sts)
R41 - sc2tog x 6 (6 sts)
Fasten off


Arms
ch 2
R1 - sc 6
R2 - *2sc, sc* x 3 (9 sts)
R3 - *2sc, sc 2* x 3 (12 sts)
R4 - *2sc, sc 2* x 4 (16 sts)
R5-7 - sc around (16 sts)
R8 - *sc2tog, sc 2* x 4 (12 sts)
R9 - sc around (12 sts)
Add stuffing here and then every few rounds to make it a little easier to stuff
R10 - *sc2tog, sc 2* x 3 (9 sts)
R11-21 - sc around (9 sts)
R22 - hdc 4, sc, sl st
Fasten off, leave long tail for sewing to body

Sew arms to body


This is the main pattern for the mermaid. For the rest, hair, face features, I know most people have their preferences for how they do them. If you are new to amigurumi, or just like to try different things, here is what I did.

For the hair I followed this hair tutorial from EssHaych. It is a little time consuming, but if you want long flowing hair (and what mermaid doesn't?), this is a great way to do it.


For the eyes I used embroidery thread and made a two round circle of 6 then 12 sc. After I sewed them on to the face I stitched a couple eyelashes on.

For the mouth I used embroidery thread as well and just made a couple stitches for a little smile.


I also stitched around the loops at the top of the tail with some gold crochet thread to add a little.


I hope you enjoy making this mermaid. If you have questions or find a mistake please comment and ask or let me know.

This pattern is for personal use only. If you would like to sell a finished product, please credit me for the design. Happy Stitches!
Read More »

Monday, June 2, 2014

Dragons - Pattern

I've always enjoyed stories with magic and mythical creatures. As I got a little older I liked the idea of dragons. I still like dragons. So what better way to pass that interest on to my kids than making them dragons to play with.


I made these two with two different types of yarn. The larger blue one is made with worsted weight acrylic yarn and the smaller green one is made with a DK weight yarn that I have been wanting to try called CotLin from Knit Picks. I really enjoyed working with it. It is 70% Tanguis Cotton and 30% Linen. It is softer than 100% cotton and not prone to splitting. But back to dragons.


I actually wrote the pattern down as I was doing this guy since I knew I would need to make one for each child. In fact I really made both at the same time since I ran out of the blue after the legs. (That's what I get for using left over yarn.) So the pictures will be a mixture of both dragons.

Materials:
Worsted or DK weight yarn, two or three colors
Hook G (worsted weight) or F (DK weight)
stitch marker 
yarn needle
Stuffing of your choice

Abbreviations:
ch - chain
st(s) - stitch(es)
sl st - slip stitch
sc - single crochet
sc2tog - single crochet two together
BLO - back loop only

Note:
Done in continuous rounds, place stitch marker in the first stitch of round, moving it up each round to mark the beginning of the round

Head
using main color, ch 2
R1 -  in 2nd ch from hook, sc 6 
R2 - 2sc in each stitch (12 sts)
R3 - *sc, 2sc* x 6 (18 sts)
R4 - *sc 2, 2sc* x 6 (24 sts)
R5 - *sc 3, 2sc* x 6 (30 sts)
R6 - *sc 4, 2sc* x 6 (36 sts)
R7 - *sc 5, 2sc* x 6 (42 sts)
R8-12 - sc around (42 sts)
R13 - sc 26, ch 8 (34 sts)


R14 - sc into st with marker, place marker into that sc. sc 33 (sc in each ch st not around) (34 sts)
R15 - sc around (34 sts)
R16 - *sc2tog, sc 6* x 3, sc2tog, sc 8 (30 sts)
R17 - sc around (30 sts)
R18 - *sc 4, 2sc* x 6 (36 sts)
R19 - *sc 3, 2sc* x 9 (45 sts)
R20-22 - sc around (45 sts)
R23 - *sc2tog, sc 7* x 5 (40 sts)
R24 - *sc2tog, sc 6* x 5 (35 sts)
R25 - sc 2, *sc2tog, sc 5* x 4, sc2tog, sc 3 (30 sts)
R26 - sc2tog x 2, sc 15, sc2tog x 2, sc, sc2tog, sc, sc2tog, sc (24 sts)
R27 - sc, sc2tog, sc 13, sc2tog, sc, sc2tog, sc, sc2tog (20 sts)
R28 - *sc, sc2tog, sc* x 5 (15 sts)
R29 - *sc2tog, sc* x 5 (10 sts)
R30 - sc2tog x 5 (5 sts)
Fasten off and weave in end to close
Stuff nose and top portion of head


Neck and Body
continue using main color


R1 - join at 8th open st of head, sc in same st, sc 7, sc2tog (next sc and first ch st), sc in next 6 ch sts, sc2tog (last ch st and next sc), sc 6 (22 sts)
R2 - sc 7, sc2tog x 2, sc 4, sc2tog x 2, sc 3 (18 sts)
R3-4  - sc around (18 sts)
R5 - sc 7, 2sc, sc 6, 2sc, sc 3 (20 sts)
R6 - sc 8, 2sc, sc 7, 2sc, sc 3 (22 sts)
R7 - sc around (22 sts)
R8 - sc 10, 2sc, sc 5, 2sc, sc 5 (24 sts)
R9 - sc around (24 sts)
R10 - sc 9, *2sc, sc 2* x 5 (29 sts)
R11 - sc around (29 sts)
R12 - sc 10, *2sc, sc 3* x 4, 2sc, sc 3 (34 sts)
R13 - sc around (34 sts)
At this point you will want to stuff the rest of the head and neck. 
R14 - *2sc, sc 4* x 6, 2sc, sc 3 (41 sts)
R15 - *2sc, sc 5* x 6, 2sc, sc 4 (48 sts)
R16-19 - sc around (48 sts)
R20 - *2sc, sc 7* x 6 (54 sts)
R21-25 - sc around (54 sts)
R26 - *sc2tog, sc 7* x 6 (48 sts)
R27 - *sc2tog, sc 6* x 6 (42 sts)
R28 - *sc2tog, sc 5* x 6 (36 sts)
R29 - *sc2tog, sc 4* x 6 (30 sts)
R30 - *sc2tog, sc 3* x 6 (24 sts)
R31 - *sc2tog, sc 2* x 6 (18 sts)
Stuff the rest of the body 
R32 - *sc2tog, sc* x 6 (12 sts)
R33 - sc2tog x 6 (6 sts)
Fasten off and weave in end to close


Leg (make 2)
using accent color, ch2
R1 - in 2nd ch from hook sc 6
R2 - 2sc in each st (12 sts)
R3 - *sc, 2sc* x 6 (18 sts)
R4 - *sc 2, 2sc* x 6 (24 sts)
R5 - *sc 3, 2sc* x 6 (30 sts)
R6 - change to main color, in BLO sc around (30 sts)
R7-9 - sc around (30 sts)
R10 - *sc2tog, sc 3* x 6 (24 sts)
R11 - sc around (24 sts)
R12 - *sc2tog, sc 2* x 6 (18 sts)
R13-16 - sc around (18 sts)
R17 - *sc 2, 2sc* x 6 (24 sts)
R18 - sc 6, *2sc, sc* x 6, sc 6 (30 sts)
R19-21 - sc around (30 sts)
R22 - sc 6, *sc2tog, sc* x 6, sc 6 (24 sts)
R23 - *sc2tog, sc 2* x 6 (18 sts)
Stuff leg 
R24 - *sc2tog, sc* x 6 (12 sts)
R25 - sc2tog x 6 (6 sts)
Fasten off and weave in end to close


Arm (make 2)
using accent color, ch 2
R1 - in 2nd ch from hook sc 6
R2 - 2sc in each st (12 sts)
R3 - *sc, 2sc* x 6 (18 sts)
R4 - change to main color, in BLO sc around (18 sts)
R5-6 - sc around (18 sts)
R7 - *sc2tog, sc* x 6 (12 sts)
R8-10 - sc around (12 sts)
R11 - *sc, 2sc* x 6 (18 sts)
R12-14 - sc around (18 sts)
Stuff arm 
R15 - *sc2tog, sc* x 6 (12 sts)
R16 - sc2tog x 6 (6 sts)
Fasten off and weave in end to close


Tail
using main color, ch 2
R1 - in 2nd ch from hook, sc 4
R2 - sc, 2sc, sc, 2sc (6 sts)
R3 - *sc, 2sc* x 3 (9 sts)
R4-8 - sc around (9 sts)
R9 - *sc 2, 2sc* x 3 (12 sts)
R10-12 - sc around (12 sts)
R13 - *sc 3, 2sc* x 3 (15 sts)
R14 - sc around (15 sts)
R15 - *sc 4, 2sc* x 3 (18 sts)
R16 - sc around (18 sts)
R17 - *sc 5, 2sc* x 3 (21 sts)
R18 - *sc 6, 2sc* x 3 (24 sts)
R19 - sl st in next 3 sts to finish, leave long end for sewing to body
Stuff tail


Ear (make 2)
using main color, ch 4
R1 - in 2nd ch from hook 2sc, sc, 2sc, turn (5 sts)
R2 - ch 1, 2sc, sc 3, 2sc, turn (7 sts)
R3 - ch 1, 2sc, sc 5, 2sc, turn (9 sts)
R4 - ch 1, sc 7, 2sc, 2sc, turn (11 sts)
R5 - sl st in first sc, sl st in next sc, sc, [hdc, dc, hdc] in next sc, sc, sl st, sc, [hdc, dc, hdc] in next sc, sc, sl st, sc (15 sts)
Fasten off, leave long end for sewing to head

Wing (make 2)
ch 16
R1 - in 2nd ch from hook sc, sc 14, turn (15 sts)
R2 - ch 1, sc 12, ch 3, turn (12 sts + 3 ch)
R3 - sc in 2nd ch, sc 13, turn (14 sts)
R4 - st st 3, sc 7, ch 3, turn (10 sts + 3 ch)
R5 - sc in 2nd ch, sc 8, turn (9 sts)
R6 - sl st 2, sc 4, ch 3, turn (6 sts + 3 ch)
R7 - sc in 2nd ch, sc 4, sl st (6 sts)
Fasten off, leave long end for sewing to body

Now you have all the pieces, and it is time to start sewing them together.

First sew on the tail to the back of the dragon body, lining it up in the middle and at the bottom of the body.


 I added the ears next. Sew to the side of the head.


Next add the legs. I pressed the side of the legs against the body and sewed it on. Use pins to hold it in place if you wish, especially the second leg if you are having trouble lining the two legs up.


Next add the arms. Position the arms slightly forward and sew on.


Before adding the wings, I stitched down the middle from the top of the head to the tail with the accent color on the green dragon and with a second accent color on the blue dragon. I made the stitches three to five rows long, longer ones in the  middle and shorter ones at the top of the head and tail, with one or two rows between. This row of stitches will be used as a base for the spikes. Unfortunately I didn't get pictures of this. Although you can somewhat see part of them here.


Once I had the spike base stitched, I added the wings, again didn't get pictures (I was excited about being almost done). I sewed each wing on about a stitch or two away from the spike base.

Spikes
Now for the spikes. I made two different types of spikes. For the blue dragon I made traditional spikes by joining the second accent color to each of the spike base stitches. Sc around the yarn 4 to 10 times depending on the length of the base stitch. Turn and decrease the stitches. I did the following:

sc 4, turn                                     sc 6, turn
ch 1, sc2tog x 2, turn                ch 1, sc2tog, sc 2, sc2tog, turn
ch1, sc2tog                                 ch 1,  sc2tog x 2, turn
                                                     ch1, sc2tog

sc 8, turn                                     sc 10, turn
ch1, sc2tog x 4, turn                 ch 1, sc2tog x 2, sc 2, sc2tog x 2, turn
ch 1, sc2tog x 2, turn                ch 1, sc2tog, sc 2, sc2tog, turn
ch1, sc2tog                                  ch 1,  sc2tog x 2, turn
                                                      ch1, sc2tog


On the green dragon I made loops instead of spikes. Join the accent color to the top spike base. Sc around the yarn 4 to 10 times depending of the length of the base stitch. Once you get to the end of the stitch ch 3 and sc around the next base stitch, continue to sc around each base stitch with a ch 3 between each until you reach the end of the tail. Turn and begin making the loops by chaining 4 to 10 sts at each sc section of the previous row then sc 4 around each ch space of the previous row, sl st into the last sc of the previous row to finish. The more ch sts the bigger the loops will be. I started and ended with smaller loops and made larger loops in the middle.


Okay, now for the fun part, embellishments. Of course you want to add eyes, I added nostrils. Then some stitching along the top of the ears.


On the wings I slip stitched along the top of one dragon and sc along the top of the other. I added stitching between rows on the belly. If you want to do more or less use your imagination.


I hope you have fun making these. If you have questions or find a mistake please comment and ask or let me know.

This pattern is for personal use only. If you would like to sell a finished product, please credit me for the design. Happy Stitches!

Read More »

Printfriendly